<?xml version="1.0" encoding="utf-8"?><feed xmlns="http://www.w3.org/2005/Atom" ><generator uri="https://jekyllrb.com/" version="4.3.4">Jekyll</generator><link href="https://alexandrearaujo.tech/feed.xml" rel="self" type="application/atom+xml" /><link href="https://alexandrearaujo.tech/" rel="alternate" type="text/html" /><updated>2026-05-31T10:59:11+00:00</updated><id>https://alexandrearaujo.tech/feed.xml</id><title type="html">Alexandre Araujo</title><subtitle>My personal blog</subtitle><entry><title type="html">eink tablet</title><link href="https://alexandrearaujo.tech/blog/eink-tablet-en/" rel="alternate" type="text/html" title="eink tablet" /><published>2026-05-26T00:00:00+00:00</published><updated>2026-05-26T00:00:00+00:00</updated><id>https://alexandrearaujo.tech/blog/eink-tablet-en</id><content type="html" xml:base="https://alexandrearaujo.tech/blog/eink-tablet-en/"><![CDATA[<p><small>Disclaimer: Please note that this text has been automatically translated from the original post found <a href="/blog/eink-tablet/">here</a>.</small></p>

<p>I needed a tablet that was always ready for me to write on. I know notebooks and pens seem like they solve the problem, too, but I wanted something digital—something that allowed content to be replicated and also offered me privacy.</p>

<p>Before settling on the tablet I chose, I spent a long time using the iPad Pro 11” M1 with Apple Pencil and the Apple Notes app. It worked well; writing wasn’t an issue, even when I recorded videos. But the thing is that sometimes the iPad wasn’t charged when I needed to write, or the screen had too many reflections.</p>

<p>I then started thinking about something more dedicated to writing. My first option was what I understand as a benchmark in the e-ink tablet category: the reMarkable. The first thing that caught my attention positively was its minimalist aspect, but I quickly dismissed it for several reasons:</p>
<ul>
  <li>The model is outdated and shows visible signs of having been on the market for many years.</li>
  <li>Limitations when transferring documents to and from the tablet, making it a closed ecosystem device.</li>
  <li>Lack of screen illumination. I know I would use most of my time in well-lit environments, but I have used e-ink devices without backlighting before, and the lack of it bothered me greatly.</li>
</ul>

<p>Continuing my search, I found the Boox Go 10.3 II Lumi. This one also had a minimalist look, seemed more open in terms of platform, and appeared to do exactly what I intended: note-taking using a stylus.</p>

<p>I went straight to buy the device on their website because it included the protective cover. When I received it, I couldn’t stop being positively impressed. I know there’s the possibility of running Android apps on it, allowing you to do many things, but all I wanted was something for writing and then exporting what I had written. For that purpose, it is extremely practical.</p>

<p>I didn’t have to create an account; I just did some slight initial setup, set a PIN to lock the screen, and created a notebook where I started writing. Exporting this notebook as a PDF is quite simple. After that, I can transfer the files to my computer either via USB-C cable or using Boox Drop, an app that allows me to access a webpage on my computer (on the same Wi-Fi network) and transfer data both from and to the tablet’s files. In fact, it’s using this method that I also transfer EPUB/PDF files to read on the tablet.</p>

<p>Perhaps this isn’t the most in-depth review, but if you are looking for a device that can serve as your digital notebook, this is certainly a good choice if you are seeking simplicity.</p>]]></content><author><name></name></author><category term="Culture" /><summary type="html"><![CDATA[Disclaimer: Please note that this text has been automatically translated from the original post found here.]]></summary></entry><entry><title type="html">eink tablet (portuguese version)</title><link href="https://alexandrearaujo.tech/blog/eink-tablet/" rel="alternate" type="text/html" title="eink tablet (portuguese version)" /><published>2026-05-26T00:00:00+00:00</published><updated>2026-05-26T00:00:00+00:00</updated><id>https://alexandrearaujo.tech/blog/eink-tablet</id><content type="html" xml:base="https://alexandrearaujo.tech/blog/eink-tablet/"><![CDATA[<p><small>🇬🇧 English Translation Available! Se você prefere ler em inglês, a versão traduzida deste artigo está disponível <a href="/blog/eink-tablet-en/">aqui</a>.</small></p>

<p>Precisava de um tablet que estivesse sempre pronto para eu escrever. Sei que caderno e caneta parecem também resolver o problema, mas queria algo que fosse digital, algo que permitisse replicar o conteúdo e que me desse privacidade também.</p>

<p>Antes de chegar no tablet que escolhi, usei o iPad Pro 11” M1 com Apple Pencil e o app Apple Notes por muito tempo. Funcionava bem; a escrita não era um problema, nem mesmo nos vídeos, mas o fato é que ao querer escrever nem sempre o iPad estava com a bateria carregada ou a tela tinha muitos reflexos.</p>

<p>Comecei então a pensar em algo mais dedicado à escrita. A primeira opção foi o que entendo por referência na categoria de tablets eink: o reMarkable. A primeira coisa que me chamou atenção positivamente era o aspecto minimalista, mas logo descartei por alguns motivos:</p>
<ul>
  <li>Modelo já ultrapassado e com sinais visíveis após vários anos no mercado.</li>
  <li>Limitações para transferir documentos de e para o tablet, tornando-o um dispositivo de ecossistema fechado.</li>
  <li>Falta de iluminação na tela. Sei que usaria a maior parte do tempo em ambiente iluminado, mas já tive eink sem iluminação e me incomodava muito a falta dela.</li>
</ul>

<p>Continuando a busca, encontrei o Boox Go 10.3 II Lumi. Ele também tinha um aspecto minimalista, parecia mais aberto em termos de plataforma e pareceu fazer bem o que eu pretendia: anotações usando a caneta.</p>

<p>Fui direto comprar o aparelho no site deles, pois ali incluía a capa para o dispositivo. Quando recebi não parei de ficar positivamente impressionado. Sei que há possibilidade de usar apps Android nele, fazendo muitas coisas, mas eu só queria algo para escrever e depois exportar o que escrevi. Para isso, ele é muito prático.</p>

<p>Não precisei criar conta; apenas fiz uma leve configuração inicial, defini um PIN para bloquear a tela e criei um caderno onde comecei a escrever. Exportar esse caderno em PDF é bastante simples. Depois, consigo transferir os arquivos para o computador pelo cabo USB-C ou pelo Boox Drop, um aplicativo que permite que eu acesse uma página web no meu computador (na mesma rede Wi-Fi) e transfira os dados de/para os arquivos do tablet. Aliás, é usando isso também que eu transfiro EPUB/PDF para ler no tablet.</p>

<p>Talvez não seja o review mais profundo, mas se você está procurando um dispositivo para ser seu caderno digital, este é com certeza uma boa escolha se busca simplicidade.</p>]]></content><author><name></name></author><category term="Culture" /><summary type="html"><![CDATA[🇬🇧 English Translation Available! Se você prefere ler em inglês, a versão traduzida deste artigo está disponível aqui.]]></summary></entry><entry><title type="html">Virtual Reality Headset</title><link href="https://alexandrearaujo.tech/blog/vr-headset/" rel="alternate" type="text/html" title="Virtual Reality Headset" /><published>2025-03-23T00:00:00+00:00</published><updated>2025-03-23T00:00:00+00:00</updated><id>https://alexandrearaujo.tech/blog/vr-headset</id><content type="html" xml:base="https://alexandrearaujo.tech/blog/vr-headset/"><![CDATA[<p>My journey into virtual reality started with curiosity to see how I could include this kind of device in my routine. The first restriction was that it had to be fully independent, not needing to be plugged into a PC or game console. Another restriction was the budget: around 700 USD (including the device and some accessories). That meant excluding the Apple Vision Pro, so I went with my second option, the Meta Quest 3.</p>

<p>With the Quest in my hands came the challenges of using it in a comfortable way, plus figuring out what I could actually do with it. Let’s break down these topics.</p>

<p><strong>Ergonomics</strong></p>

<p>I tried to keep it as portable as possible to take with me on trips, but that idea didn’t last long. The basic strap doesn’t balance the weight well, so I switched to the Meta Elite Strap with battery. It’s much more comfortable, but now it’s not ideal for flights because of the size, shape, and battery. I’d love to just throw it in my checked bag, but the battery isn’t removable and takes up precious space in my carry-on.</p>

<p><strong>Fitness and Mental Health</strong></p>

<p>It would be great to have a device where I could see strength training exercises and practice along in real time. However, the available apps so far don’t deliver a great experience for that. Most of them focus on boxing or fighting. There’s potential here, but it’s not available yet.</p>

<p>For mental health, I thought it would be cool to immerse myself in calm environments to meditate. But I immediately scrapped that idea when I remembered that the whole goal of meditation is to focus on your body, and having a screen strapped to my face makes no sense.</p>

<p><strong>Virtual Display for Work</strong></p>

<p>This was one of the main goals I had for the device. After trying a few options like Immersed, Horizon Workrooms, and Virtual Desktop, I chose Virtual Desktop. It supports offline use and is more stable in terms of image quality and comfort.</p>

<p>However, I rarely use it. I’m still trying to find a comfortable setup, but I always end up going back to my laptop display. There’s something about having the screen so close to my eyes, and the weight of the Quest, that just doesn’t feel right for longer sessions.</p>

<p><strong>Movies</strong></p>

<p>This is probably the category where it works best so far. I enjoy watching YouTube and movies on the device and have actually replaced my iPad for that use.</p>

<p>Despite all of this, I still think it was worth the purchase. Some things I couldn’t really understand from reviews alone, the hands-on experience helped me see the real use cases and limitations. There’s a lot of potential here, even though the device feels a bit rustic for now. I wouldn’t recommend it to non-techy friends or older folks just yet, but I really believe this type of device could easily replace many of the screens we use today.</p>]]></content><author><name></name></author><category term="Culture" /><summary type="html"><![CDATA[My journey into virtual reality started with curiosity to see how I could include this kind of device in my routine. The first restriction was that it had to be fully independent, not needing to be plugged into a PC or game console. Another restriction was the budget: around 700 USD (including the device and some accessories). That meant excluding the Apple Vision Pro, so I went with my second option, the Meta Quest 3.]]></summary></entry><entry><title type="html">How I manage my data</title><link href="https://alexandrearaujo.tech/blog/data-management/" rel="alternate" type="text/html" title="How I manage my data" /><published>2024-03-12T00:00:00+00:00</published><updated>2024-03-12T00:00:00+00:00</updated><id>https://alexandrearaujo.tech/blog/data-management</id><content type="html" xml:base="https://alexandrearaujo.tech/blog/data-management/"><![CDATA[<p>Here’s how I manage all my digital assets. It works well for me. Let me know if you have any questions.</p>

<p><strong>Active Data</strong><br>
I store this data on my OneDrive. Here, I keep things I use daily and care about: projects, references, photos, documents, etc.</p>

<p>Root tree of my OneDrive:</p>
<ul>
  <li>Apps: backups/exports of data from apps, like Todoist.</li>
  <li>Areas: files related to different areas of my life, such as home, health, employer, etc.</li>
  <li>Contacts: mainly WhatsApp conversations that I export and delete from the app but keep here.</li>
  <li>CoreDocuments: essential documents for life planning, like an Excel sheet with an annual plan.</li>
  <li>Pictures: my photos, organized by year or by event if there are many photos.</li>
  <li>Projects: supporting material for my current projects.</li>
  <li>References: various reference materials, like videos, books, articles, etc.</li>
  <li>zArchiveYYYY: a temporary folder where I move items that need to be archived. YYYY represents the current year. The “Z” keeps it at the end of the list.</li>
</ul>

<p><strong>Cold Archive</strong><br>
After the year ends, I move the zArchiveYYYY folder to an encrypted 7zip file, split into 2GB chunks to make it easier to transfer. I store three copies of this: two at home on an external drive and on a NAS; the third copy is kept on Amazon AWS S3 Glacier Archive.</p>]]></content><author><name></name></author><category term="Engineering" /><summary type="html"><![CDATA[Here’s how I manage all my digital assets. It works well for me. Let me know if you have any questions.]]></summary></entry><entry><title type="html">The Principles I use for Choosing Technology Tools</title><link href="https://alexandrearaujo.tech/blog/tech-principles/" rel="alternate" type="text/html" title="The Principles I use for Choosing Technology Tools" /><published>2022-07-09T00:00:00+00:00</published><updated>2022-07-09T00:00:00+00:00</updated><id>https://alexandrearaujo.tech/blog/tech-principles</id><content type="html" xml:base="https://alexandrearaujo.tech/blog/tech-principles/"><![CDATA[<p>Technology has become an essential part of our lives, and as a developer, I’ve learned to rely on the best tools to stay organized and productive. In this blog post, I’ll share my principles for choosing the best technology tools that have helped me to achieve my goals.</p>

<p>Principles:</p>

<ul>
  <li>Multi-Platform: When choosing technology tools, I always go for the ones that are available on multiple platforms - web, mobile, and desktop. This way, I can switch between devices without worrying about losing my data or changing my tools.</li>
  <li>Long-Term Maintenance: I always look for tools that have a good maintenance track record and focus on long-term support. This means that I can set up and use them for years to come without worrying about having to migrate to a new tool just because the old one doesn’t work on the latest device.</li>
  <li>Reasonable Price: While there are many free tools available, I prefer to pay for the tools that I use. This ensures that the developers have a direct revenue stream from their clients and are incentivized to provide long-term support and improvements to the tool.</li>
  <li>Data Exportability: Finally, I always look for tools that allow me to export my data in a human-readable format. This way, I can keep frequent copies of my data and be free to migrate to a different tool if necessary.</li>
</ul>

<p>Example: Todoist is a productivity tool that fits all my principles. Todoist is available on multiple platforms, including web, desktop, and mobile devices. It has a good track record of long-term support and regular updates to ensure it remains compatible with new devices. Todoist offers a reasonable price for its premium features, which I use to help me stay organized and productive. One of the best features of Todoist is its ability to export data in multiple formats, including CSV and JSON, which makes it easy to migrate my data to another tool if needed.</p>

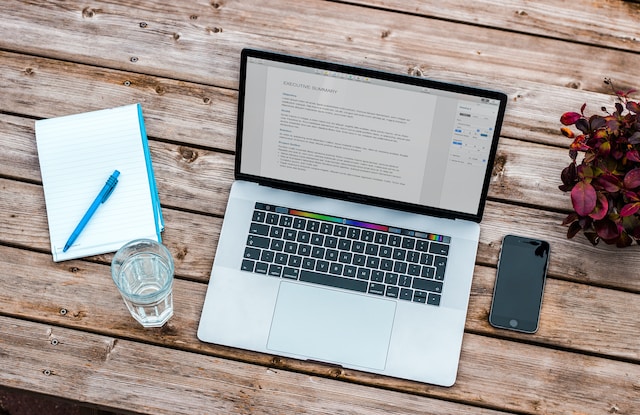
<p><img src="/assets/images/macbook-iphone-glass-wooden-top.jpg" alt="macbook-iphone-glass-wooden-top"></p>

<p><small>Image from <a href="https://unsplash.com/photos/n8Qb1ZAkK88">@bramnaus</a></small></p>

<p>Do you have any technology principles that have helped you to master your tools? Share them in the comments below! And if you haven’t tried Todoist yet, give it a try and see how it can help you to stay organized and productive.</p>]]></content><author><name></name></author><category term="Digital Culture" /><summary type="html"><![CDATA[Technology has become an essential part of our lives, and as a developer, I’ve learned to rely on the best tools to stay organized and productive. In this blog post, I’ll share my principles for choosing the best technology tools that have helped me to achieve my goals.]]></summary></entry><entry><title type="html">How I manage my backups</title><link href="https://alexandrearaujo.tech/blog/backup-strategies/" rel="alternate" type="text/html" title="How I manage my backups" /><published>2022-03-22T00:00:00+00:00</published><updated>2022-03-22T00:00:00+00:00</updated><id>https://alexandrearaujo.tech/blog/backup-strategies</id><content type="html" xml:base="https://alexandrearaujo.tech/blog/backup-strategies/"><![CDATA[<p>There are a lot of ways to handle backups these days, but this is how I currently do it.</p>

<p>I wanted a lightweight solution without background jobs because I don’t need real-time backups of my work. What I need is a system that, when I run it, creates encrypted snapshots of changes and stores them in multiple locations.</p>

<p>My data is centralized on a portable SSD, which includes the following key folders:</p>

<ul>
  <li>OneDrive: I use this mainly as a shared folder between my devices. I don’t rely on any services here — it’s just files that I could store anywhere else if needed</li>
  <li>Archive: A collection of things I’m no longer actively working on or that aren’t immediately relevant but still worth keeping</li>
  <li>PersonalServer: A replica of my Linux server</li>
  <li>Developer: A replica of my “Developer” folder from my computer, which contains the repositories for apps I maintain</li>
</ul>

<p><strong>The Backup Process</strong></p>

<p>Before backing anything up, I run a script that updates these folders on the SSD. Then, I use Restic to back everything up to two locations (both encrypted):</p>
<ul>
  <li>My local NAS</li>
  <li>Hetzner Storage Box</li>
</ul>

<p>This setup gives me three copies:</p>
<ul>
  <li>A local copy on my SSD</li>
  <li>Another on my NAS</li>
  <li>A remote copy on Hetzner</li>
</ul>

<p>I highly recommend Restic if you’re comfortable with the terminal. It takes only a few minutes to set up the first time, and after that, it’s pretty easy to maintain</p>]]></content><author><name></name></author><category term="Technology" /><summary type="html"><![CDATA[There are a lot of ways to handle backups these days, but this is how I currently do it.]]></summary></entry></feed>